- Go to Dashboard
- On the left side of the webpage under Overview, click on Communities
- Select Create community button
- Add a community cover photo
- Add a name and description for the community
- Select the privacy of the community
- Connect an existing Slack channel, or create a new one
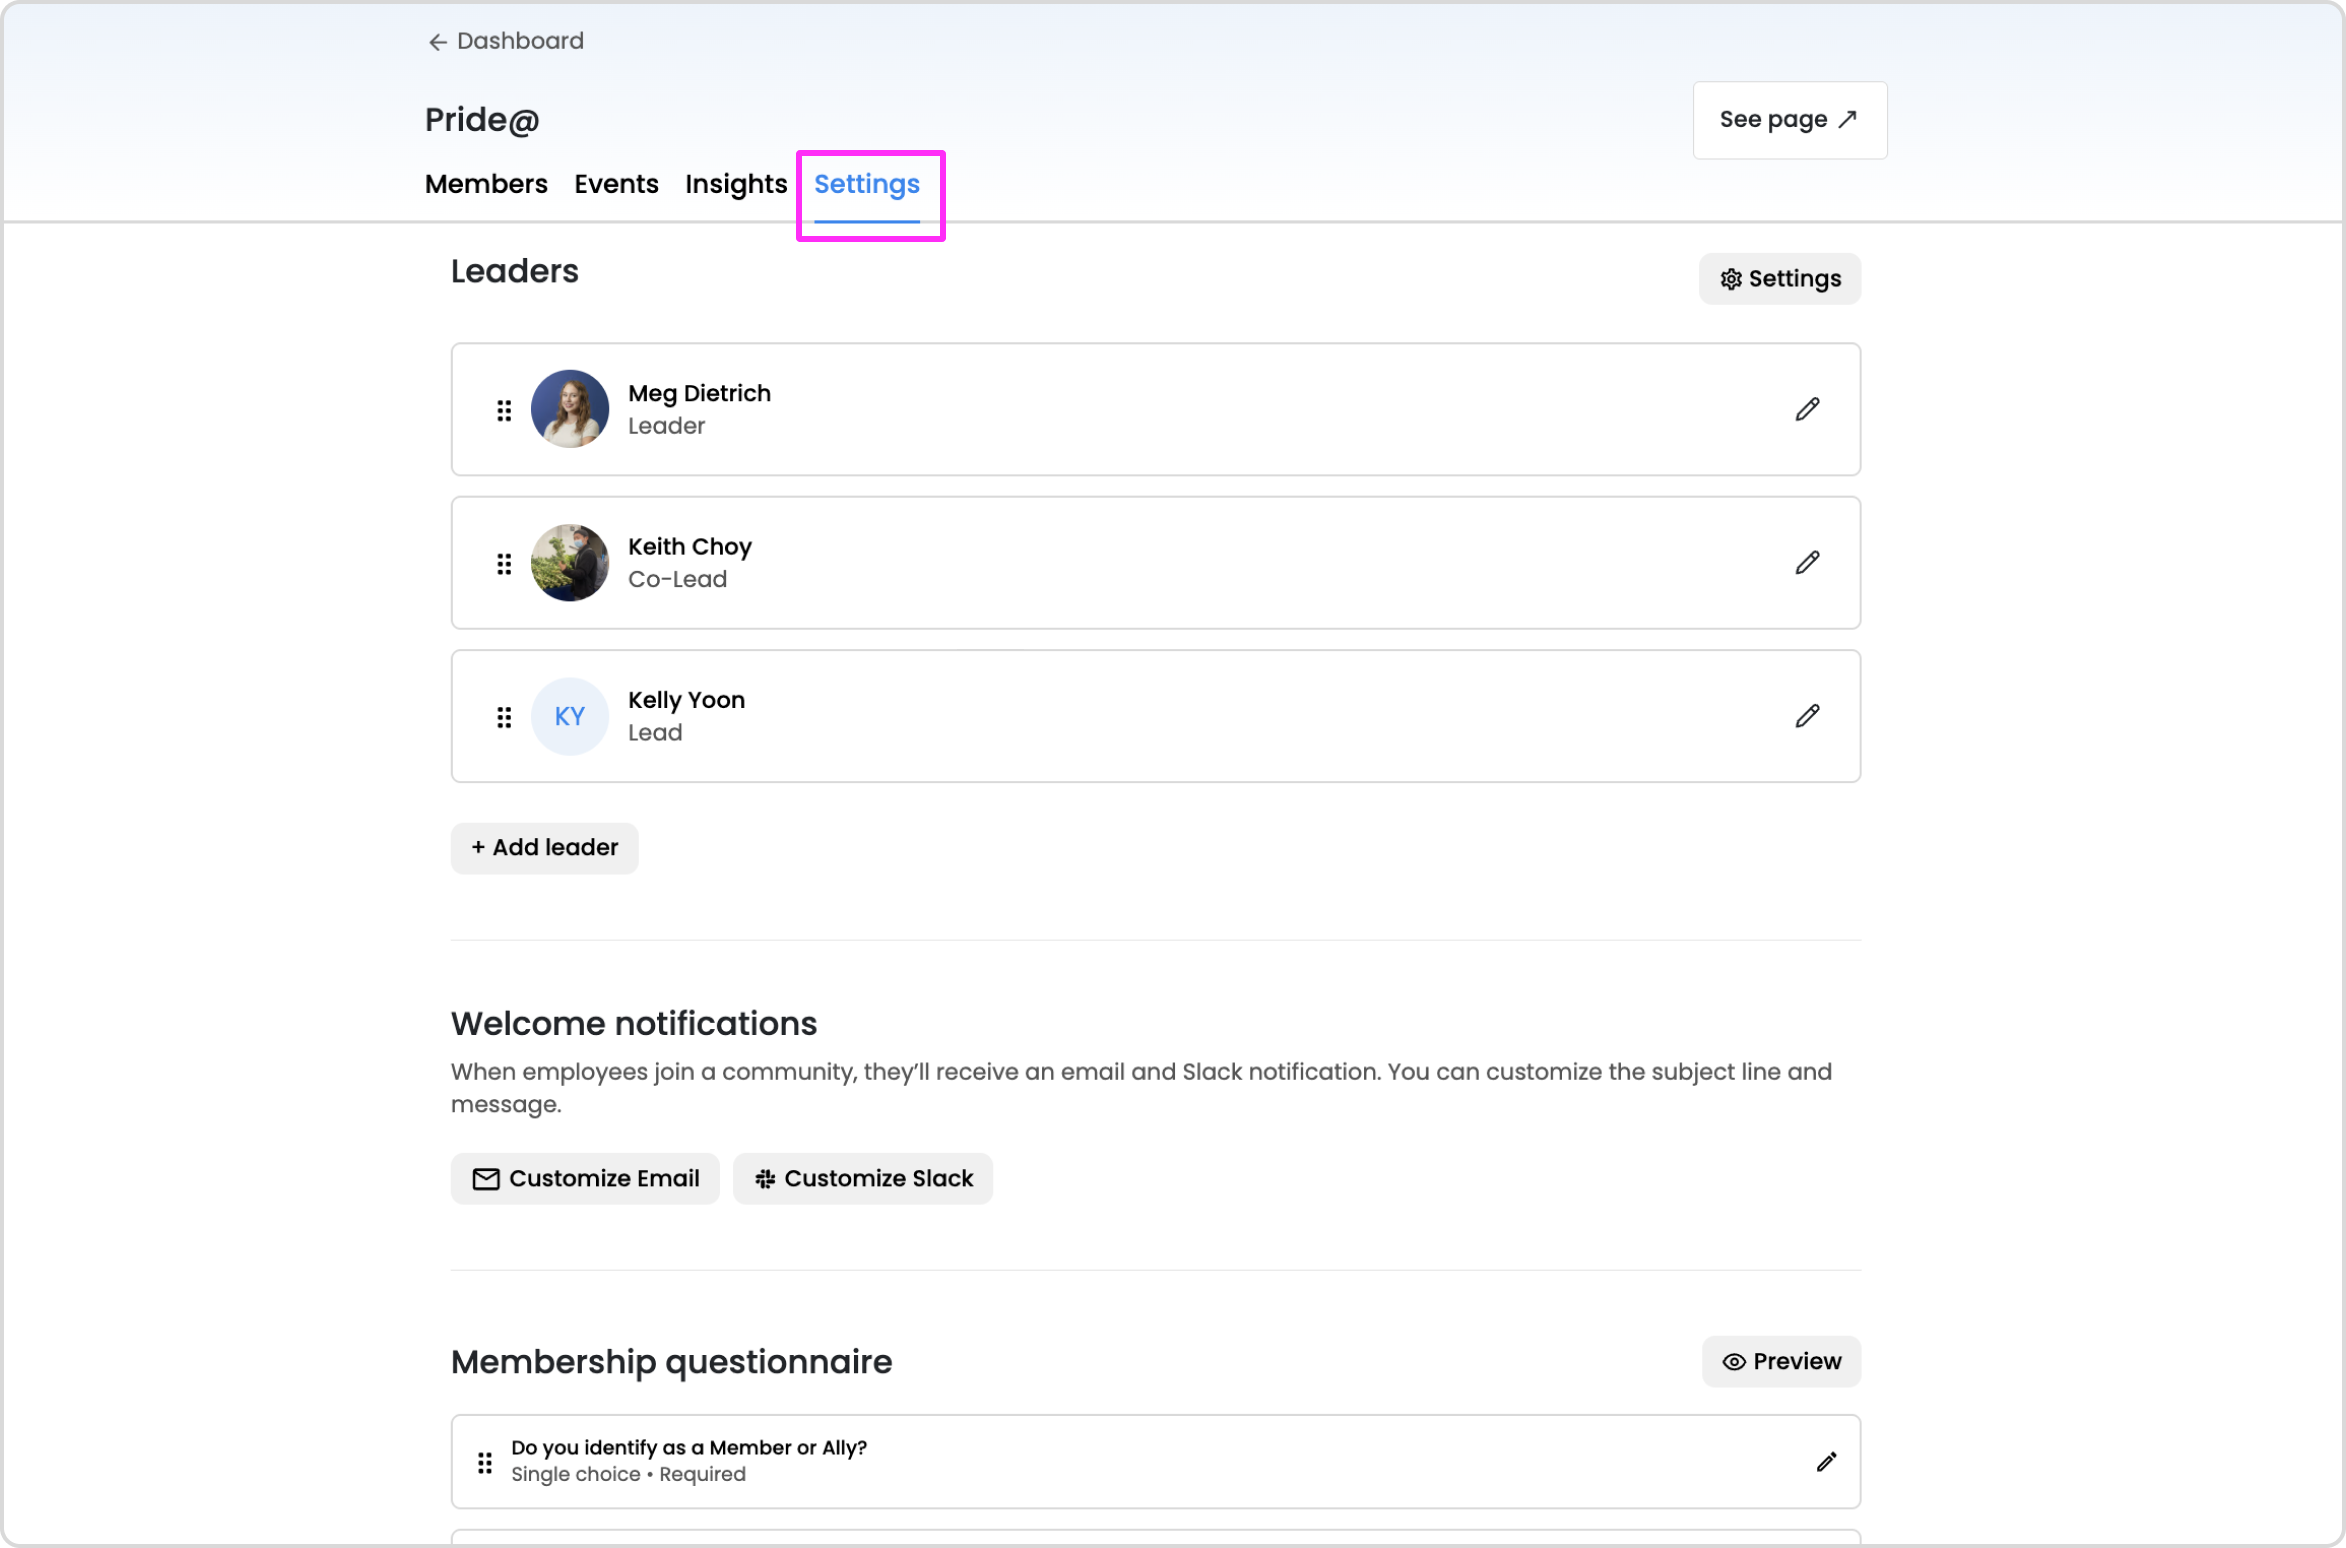
Customizing the community settings
Once your community is created, you can customize some of the additional settings:
- Edit the community details at any time (name, description, image, community privacy).
- Designate the leaders of the community and their role (this will also grant them access into the community dashboard).
- Input the reply-to email (under the "Settings" button next to the leaders).
- Customize the welcome email & Slack notifications for new members.
- Create a membership questionnaire.
- Connect a Slack channel to your community (members will be automatically added to the connected channel when they join the community).