Epoch has a new event builder! To make it easier for you create and manage your events, we've made some big changes to how Epoch looks.
What's new:
Simplified event creation
We've pared down the draft event creation form to only the absolutely necessary fields.
Once your event draft has been created, you can customize your event by enabling the Epoch features you know and love.
Once your event is published, changes will go live right away
This removes any confusion between the "saved" and "published" state.
This will also avoid divergent versions between what is saved and what guests see.
You can learn more about different event states in this article.
View insights and make edits all in one place
We made it easier to manage your event so you no longer need to navigate back and forth between the event editor and event insights to edit your event.
You'll now be able to make edits and view insights all in the same page -- for example, you'll be able to add new survey questions on the same page you see survey responses.
Canceled events
The option to archive an event has been replaced with the option to delete a draft event, or to cancel an event.
This will reduce clutter in your events dashboard as canceled events will only remain in Epoch for 30 days after an event is canceled, but you'll retain the ability to restore or duplicate a canceled event within this period.
We've updated the behaviour of any canceled events to match Google Calendar and Outlook Calendar.
How to create a single event in Epoch's new event builder
Go to Dashboard.
Select Create event in the top right.
Select Single event and click Next.
You'll be prompted to fill out the event details to create a draft event:
Add an event cover photo. Cover photos in Epoch have a square aspect ratio of 1:1.
Add the event title.
Double check the time zone for your event.
Select the date and time for your event. Choose an all-day event if you'd like to block off the full day or add a placeholder.
Choose the format for your event: virtual, in-person, or both for a hybrid event.
Add a description for your event.
Set the visibility for your event. Choose between a public and private event. Private events are only available and visible to those invited across Epoch, Slack, and calendar.
Select an existing team. This is the team that will be hosting the event.
You have the option to select a location. This helps employees discover your event.
When all the required fields are populated, click Create draft.
The event details will be populated in the event editor, where you can configure additional event settings.
When you're ready, you can publish the event. To do this, click the Draft button in the top right of the page and click Publish from the dropdown.
How to create a multi-session event in Epoch's new event builder
A multi-session event has different sessions within it related to a similar topic. Some examples include a team offsite, a week-long onboarding program for new hires, or set of mandatory training sessions.
The benefit of creating a multi-session event is that your guests can easily RSVP to the entire series with just one click on Slack or the Epoch event page. They will also receive calendar invitations for each session all at once. Data from all sessions will be aggregated on the same insights page.
Go to Dashboard.
Select Create event in the top right.
Select Multi-session event.
You'll be prompted to fill out the event details to create a draft event:
Add an event cover photo. Cover photos in Epoch have a square aspect ratio of 1:1.
Add the event title.
Add a description for your event.
Set the visibility for your event. Choose between a public and private event. Private events are only available and visible to those invited across Epoch, Slack, and calendar.
Select an existing team. This is the team that will be hosting the event.
You have the option to select a location. This helps employees discover your event.
The event details will be populated in the event editor, where you'll also add sessions for the event. This is also where you can configure additional event settings.
When you're ready, you can publish the event. To do this, click the Draft button in the top right of the page and click Publish from the dropdown.
Updating and managing your event in the editor
The editor is where you'll be able to manage your event. Features to customize your event live across the different tabs of the editor.
Overview
The overview tab is where you'll edit basic event information.
You can edit your event details such as date, time, description by clicking Edit event.
Select the Categories that relate to your event for employees to discover using filters.
Edit the event organizer. They will receive any reply-to emails.
For a multi-session event, you'll be able to edit and add sessions to your event.
Registration
You're able to customize your event via the registration tab on the editor:
Allow self check-in to allow guests to mark themselves as checked in for an event.
Choose who can see the attendee list.
Set a capacity limit for the event.
Set your target attendance.
Create a questionnaire if you want to send a survey to attendees before the event. You can choose whether to create questions from scratch or use a template that someone from your company has created before.
Questionnaire responses will appear directly in the registration tab, so you'll be able to manage the questionnaire settings and view responses all on one page.
Invite guests to your event
You can also invite guests from the registration tab. To invite guests, your event must be published.
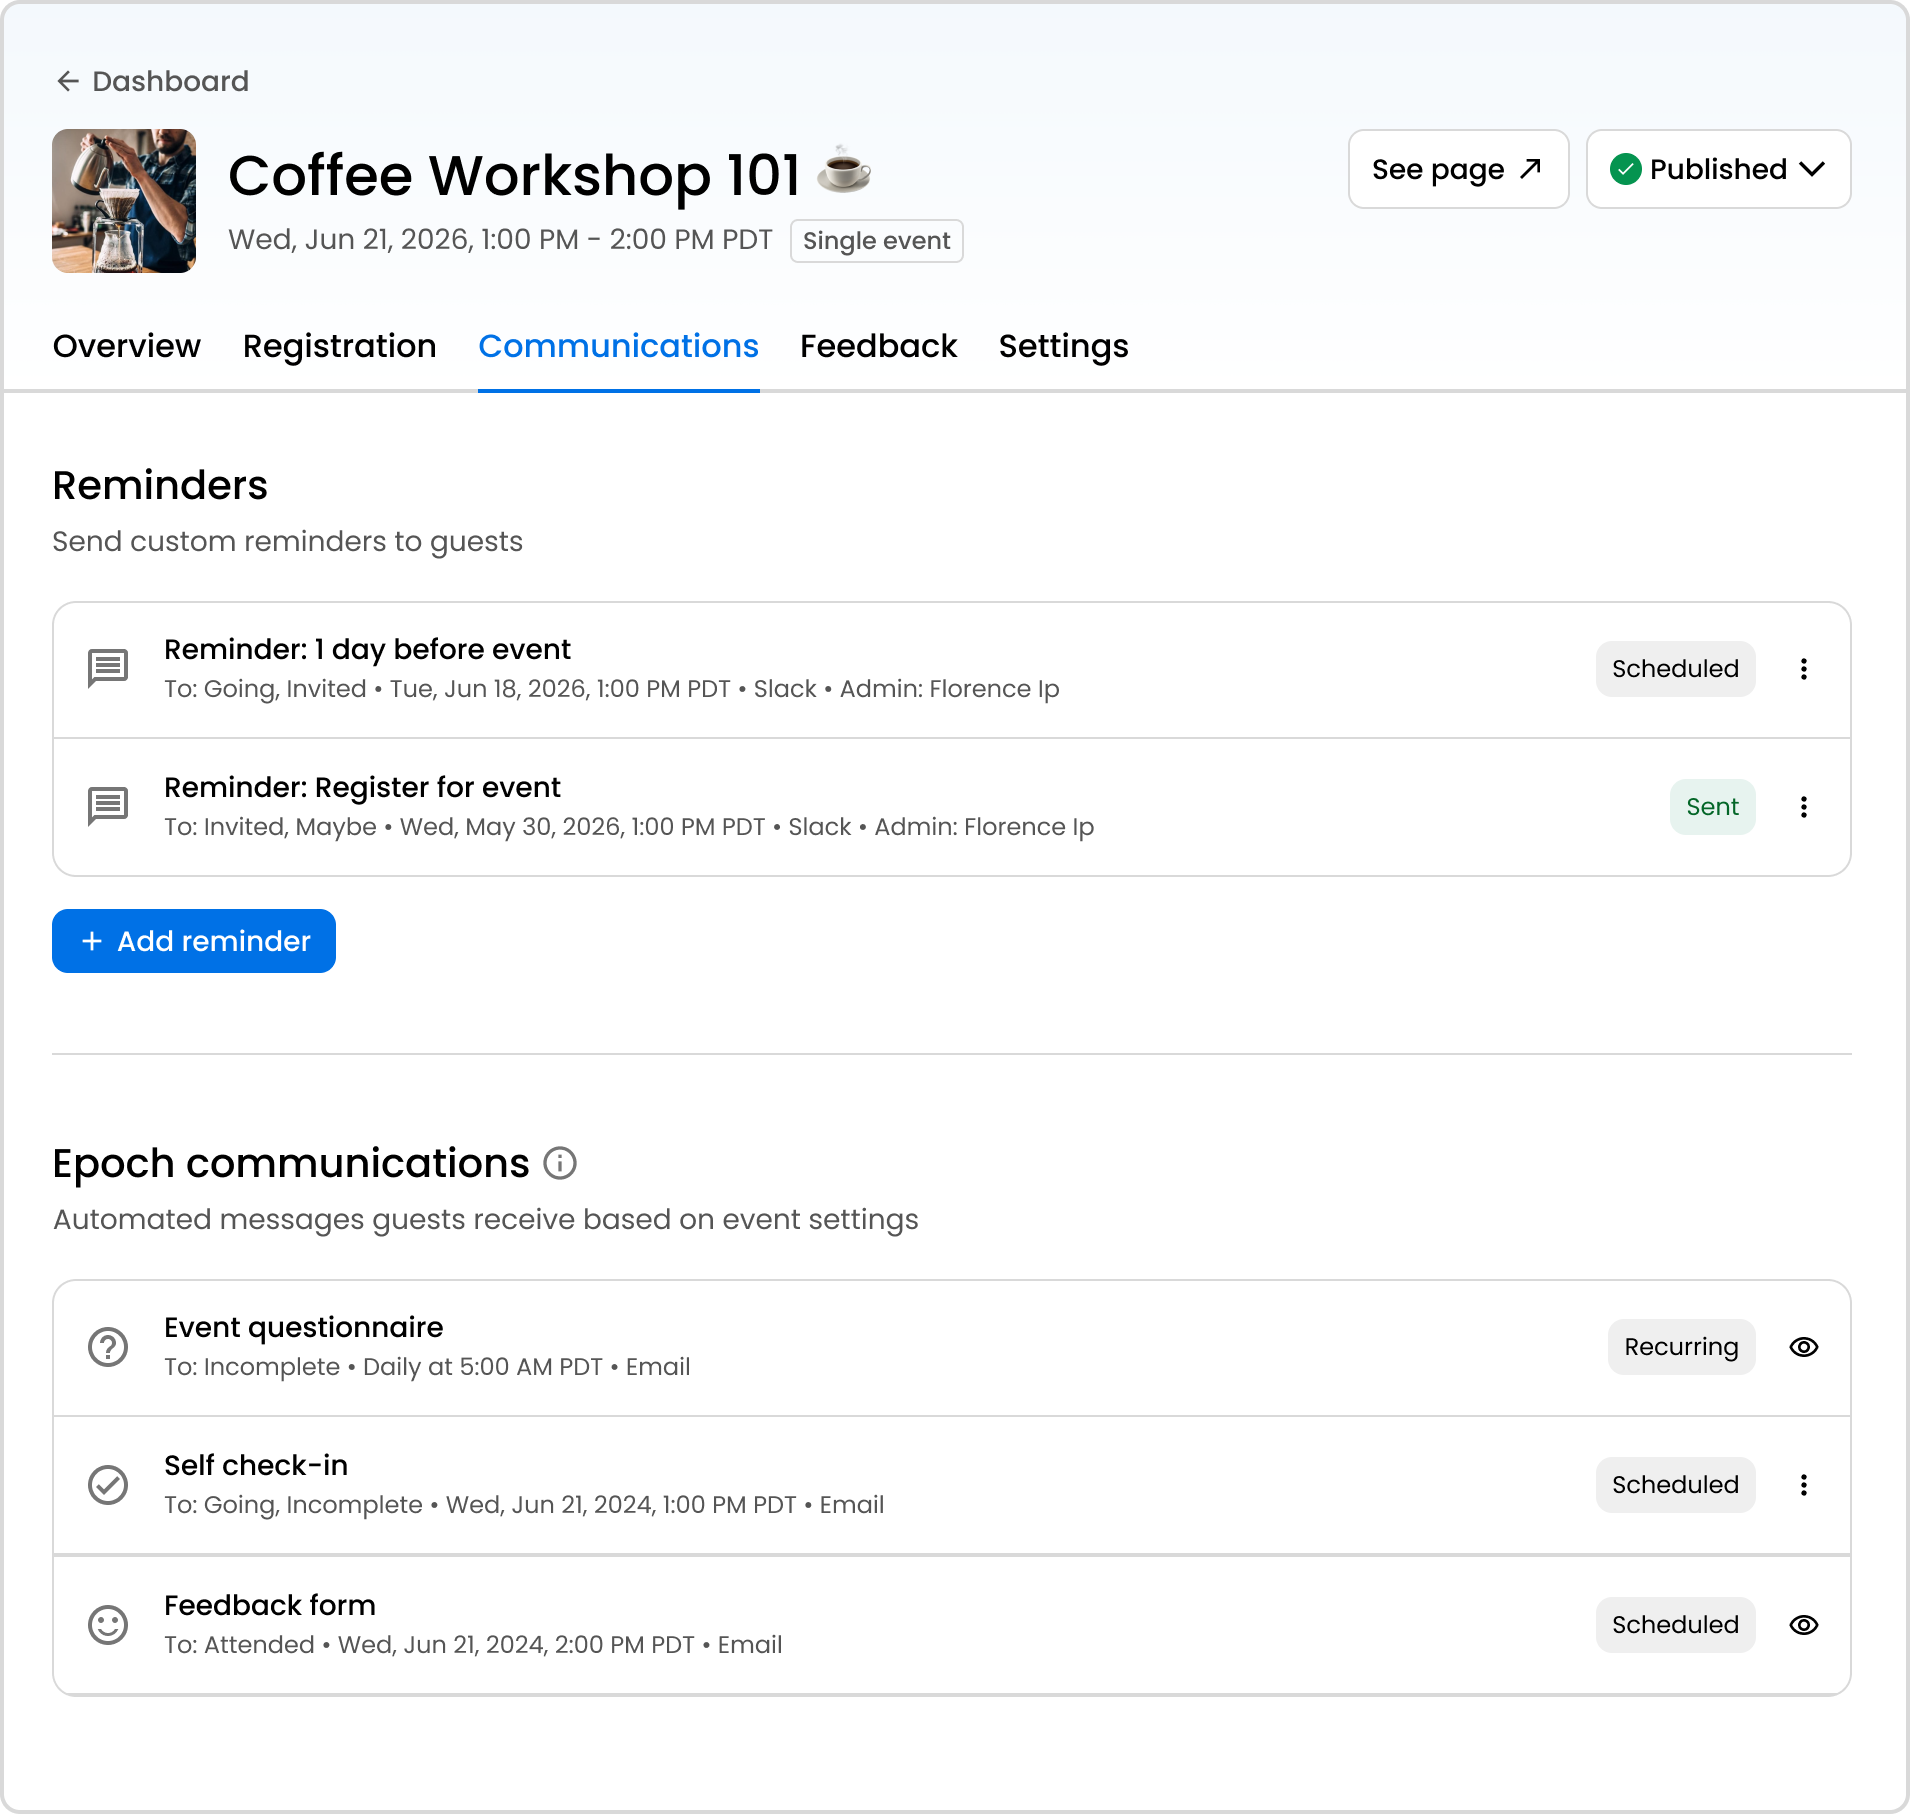
Communications
Create custom Slack or email reminders for confirmed attendees before the event begins. Reminders must include a message and specify the guests who will receive them.
View and manage Epoch notifications. These are automated communications that are sent to guests based on customizable features.
Feedback
Create a feedback form if you want to send a survey to attendees after an event.
Choose whether to create questions from scratch or use a template that someone from your company has created before.
After a question has been added or a template has been used, you can configure the settings by clicking Settings button in the Feedback form questions section.
Choose if you would like the survey to be anonymous or not.
Set when you want the form to be sent to attendees.
Choose how you would like to notify guests to fill in the feedback form.
Feedback form responses will appear directly in the feedback tab, so you'll be able to manage the feedback form and view responses all on one page.
Settings
On the settings tab you can:
Configure the calendar settings for your event. These settings can only be edited if the event is a draft. Changes can't be made after the event is published.
Connect a Slack channel. You can create a new channel or use an existing one. When individuals register for your event, they will be automatically added to the Slack channel.
Add the estimated spend amount for the event.
Duplicate the event.
Delete the event draft, or cancel a published event.
What draft events can I delete as an admin?
Draft deletion follows the same permission rules as backend event visibility.
An admin can only see and edit Published, Past, Draft, and Canceled events for the teams they administer, so you can only delete draft events created within your own team(s) — not any draft event platform-wide.
Want access to a beta feature?
Get in touch with our customer experience team. We'll reach out with next steps.